
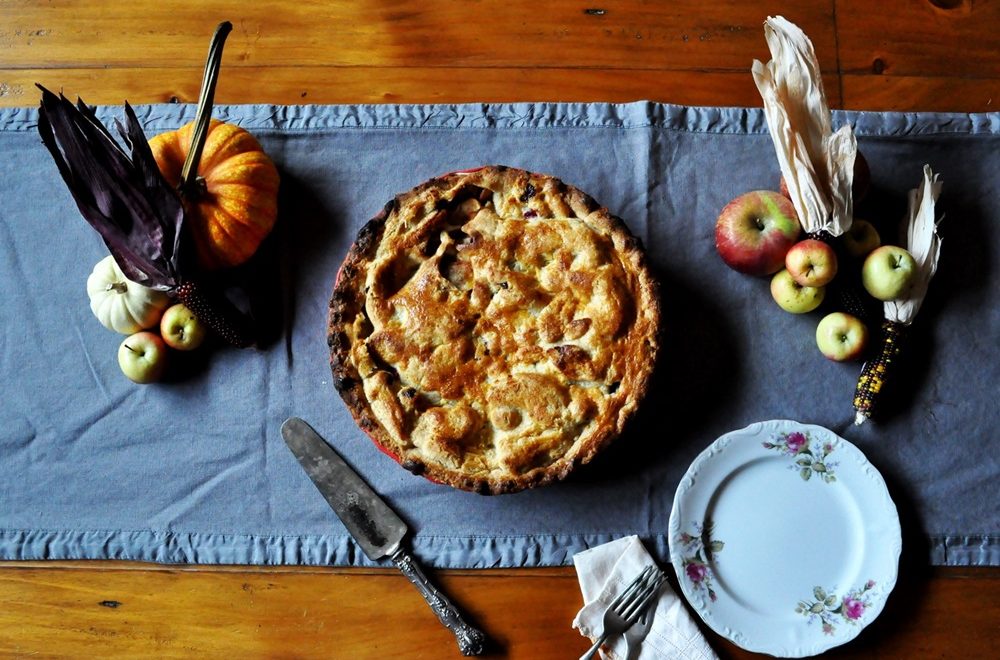
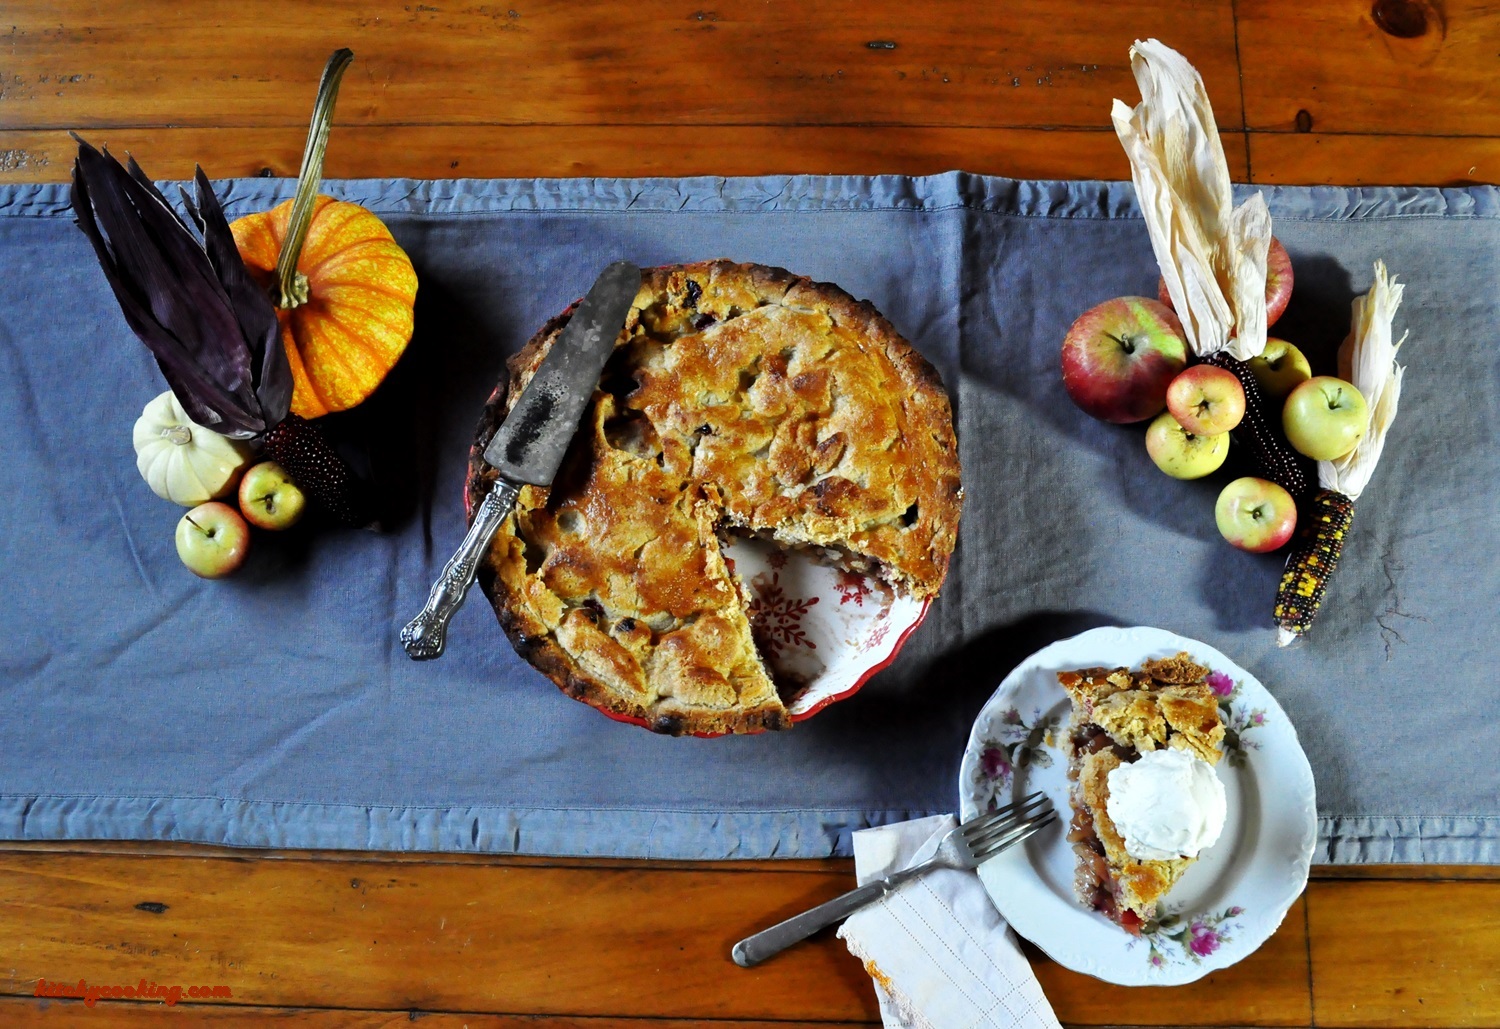
Apple Cranberry Pie
I mentioned last week how we’ve hit the holiday season, and it’s suddenly all about turkey and stuffing. While I love turkey and stuffing it’s not my favorite thing about the holidays. My favorite thing about the holidays are the desserts. Don’t get me wrong, I love turkey and stuffing, but dessert, dessert is wear my heart truly lies. The most common desserts seem to be pies, so for the next few weeks Kitchy Cooking is going to be all about pie.
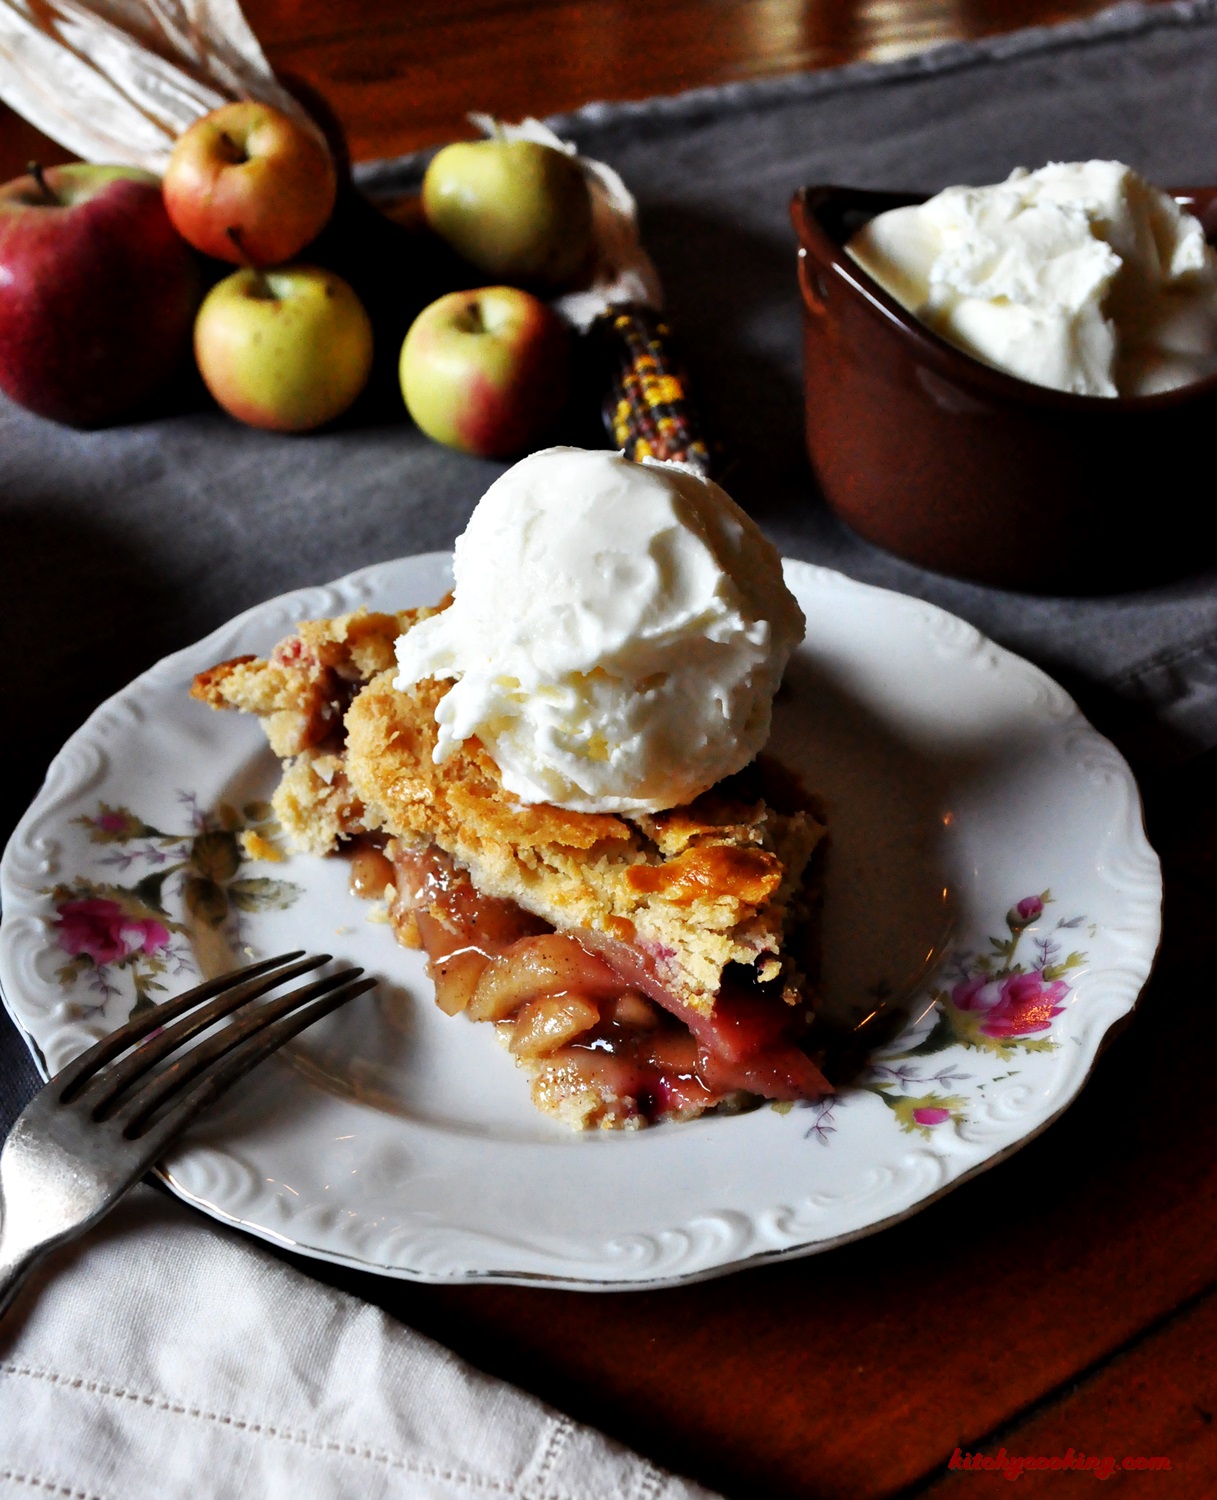
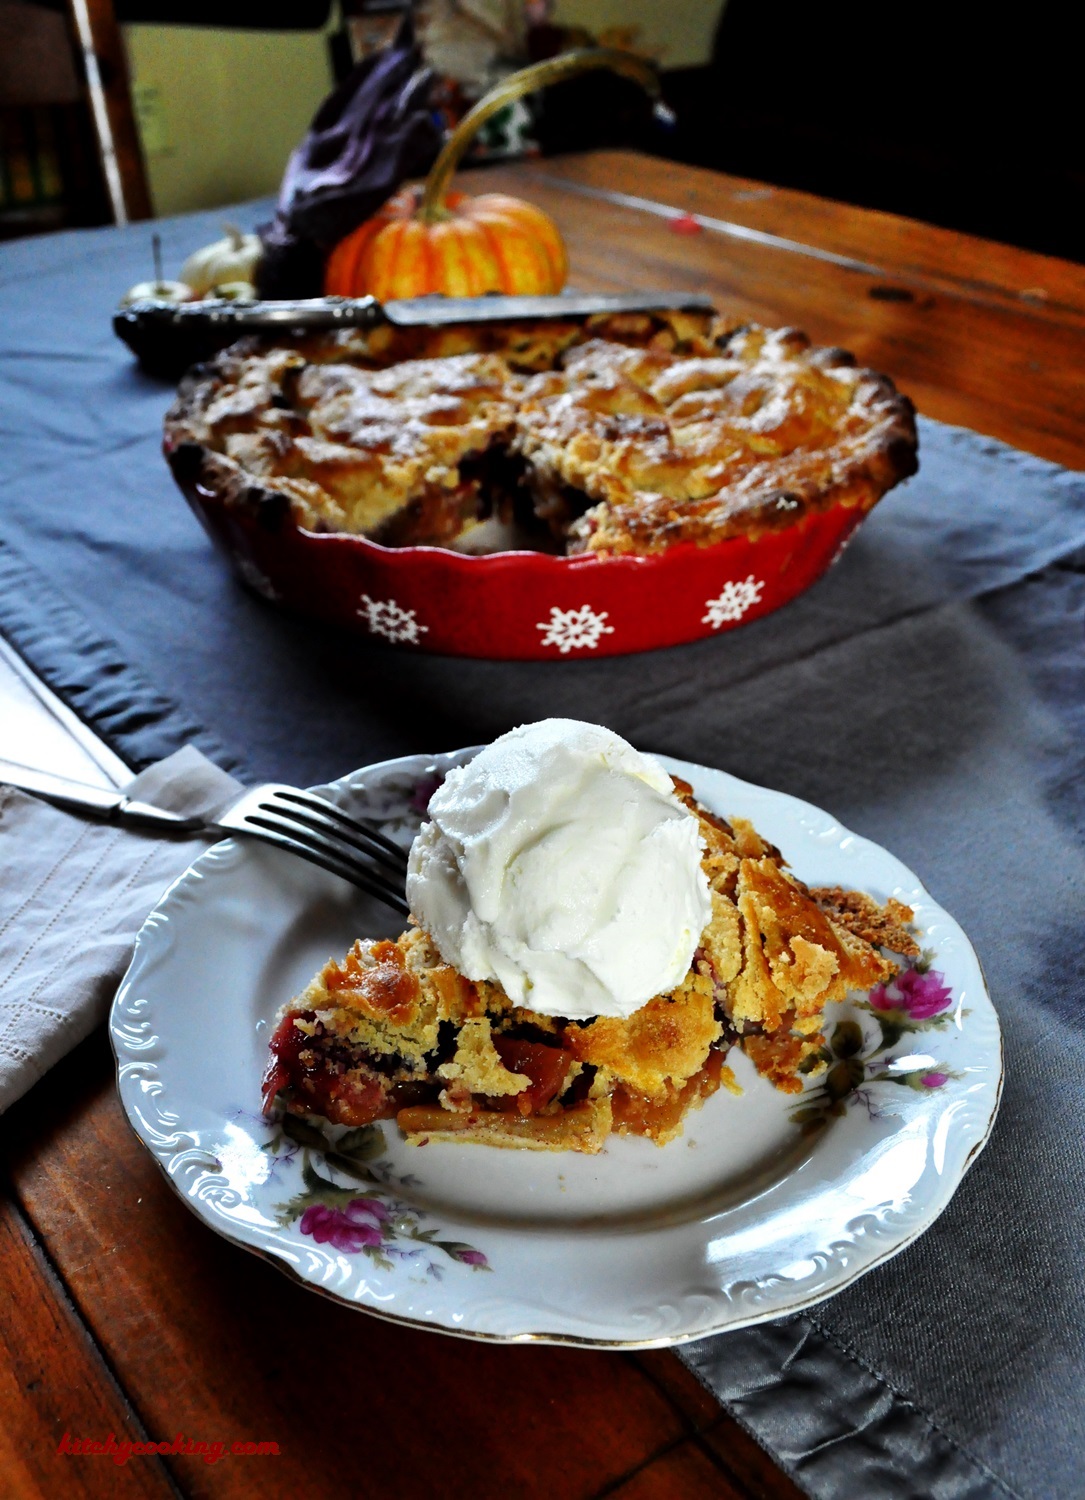
Last week I made an apple and fig tart. This week, I’m going full pie and with an Apple Cranberry combo. I’ve always loved pie, especially if it has a scoop of vanilla ice cream on top. I like them in all shapes, sizes and flavors from apple to berry. But while I enjoy eating them, I’ve never enjoyed making them. It was the crust. The crust always intimidated me. I mean, I’ve had so many flaky, crispy, delicious crusts in my life, the thought of trying to recreate that terrified me. But then I heard about a crust-making class from the Pacific Food & Beverage Museum. So, I bit the bullet and went.
The Crust
I learned a ton! I’ve always known that you needed to keep everything iced cold, and that lard made a flakier crust. But it was the technique that blew me away. The fact that using a pastry cutter rather than a food processor really does make a difference. While it cuts the butter and lard into smaller pieces, the pieces aren’t uniform so the flaky aspects of the crust aren’t uniform which makes for a better and more flavorful crust. I also always thought that covering a cutting board with flour and rolling out the crust with a wooden rolling pin was the way to go. But it turns out neither of those are true. While you could absolutely use flour and a wooden rolling pin, it’s better to have two pieces of parchment paper and a bottle. The dough is sandwiched between the two pieces of parchment and the bottle is your rolling pin. The parchment makes it much easier to both roll out the dough and transfer it to a pie plate while the bottle is filled with cold water to keep the dough chilled. All these little tips and tricks gave me the confidence to try my hand and see what I could do. The result: a pie crust I was proud of! A crust I could share with others and love eating!
The Filling
So, now that I have the crust figured out, it’s time to fill that crust. The possibilities are endless. But because it’s fall and the start of the holiday hustle and bustle I went with the apple cranberry combo I mentioned earlier. See, out of all the pies out there, apple isn’t one of my favorites. I prefer chocolate or berry. I’ve just never been wild about how gooey and super sweet apple pies are. But that’s mainly because of how it’s cooked or the kind of apples you use. Did you know apple pie is better if you use a variety of apples rather than one kind? The combination of apples makes for a more flavorful, well rounded pie, especially if you use a tart and a sweet apple. And apple pie is one of the few pies where you don’t have to cook the filling before it goes into the shell! Adding the filling without cooking it keeps some of the crunch rather than getting a mushy mess. If there’s one thing I can’t stand, it’s mushy apples. I added the cranberries because I wanted to do something different. That and I absolutely love cranberries. Once those little red spheres show up at grocery stores, I buy as many bags as I can. Those cranberries add a little burst of tart among all the sweet. It made for a wonderful, winter dessert that I can’t wait to make again, and would be great on any holiday table.
So, now that I’ve figured out crust and made a couple I’m proud of, you’ll be seeing a lot more pie on the blog, starting with the next few weeks. Some pies will have a top and bottom crust, while others will only have one or the other. Unfortunately there’s still one thing left for me to figure out: how to make a pretty design. Maybe I can figure that out before the holidays end. Hmmm… sounds like a new goal!

Ingredients
Crust
- 2-1/2 cups flour
- 1/4 teaspoon salt
- 2 tablespoons sugar
- 1/2 cup (1 stick) cold butter
- 8 tablespoons chilled lard
- 2 - 4 tablespoons ice water
Pie Filling
- 4 Honey Crisp apples, peeled, cored and sliced
- 4 - 5 Macintosh or Granny Smith apples, peeled, cored and sliced
- 1/4 cup sugar
- 1/2 cup brown sugar
- 2 tablespoons flour
- 1 teaspoon cinnamon
- 1/2 teaspoon ground nutmeg
- 1/2 teaspoon allspice
- 1 cup fresh or frozen cranberries
- 2 tablespoons butter cubed
- 1 egg, beaten
Instructions
Crust
- Sift together the flour, sugar, and salt in a large bowl until combined. Add the cold cubed butter and cold lard. Using a pastry cutter, cut them into the dry ingredients until you have small pea-sized crumbs. (It's okay if you have some bigger sizes.)
- Slowly add the iced water, a tablespoon at a time, until the dough starts to come together.
- Dip your fingers in iced water to keep them cold and pack the dough into a ball. Divide the ball in half and press each portion into a flat circle. Wrap tightly in plastic wrap and chill for at least an hour. (The dough can last in the fridge for three days or in the freezer for up to 3 months, just make sure to thaw it out in the fridge when you're ready to use.)
- Place each disc of dough between two sheets of parchment paper and roll out until about 1/4 -inch thick. Transfer one of the discs to the pie plate, prick with a fork and set aside.
Make the filling
- Preheat the oven to 400 degrees F.
- Toss the next nine ingredients (through the cranberries) together in a large bowl until well combined and the apples and cranberries are coated with the flour and spices. Pour the apple mixture into the prepared pie shell. Dot with butter.
- Take the other rolled out pie crust and lay it on top. Crimp the edges and cut a few slits in the top to let the steam escape. Brush the top crust with the egg wash.
- Place the pie on a cookie sheet and bake for 40 - 45 minutes or until the crust is golden and the filling is bubbling. Let cool for at least 10 minutes and serve.